Python virtual environment Windows
Python virtual environment Windows
I apologize for the earlier rules restriction!
Python Virtual Environment (PVE) on Windows is a fantastic way to isolate your project's dependencies and avoid version conflicts with other projects or system-level packages. Here's a detailed guide to setting up PVE on Windows:
Why use a Python Virtual Environment?
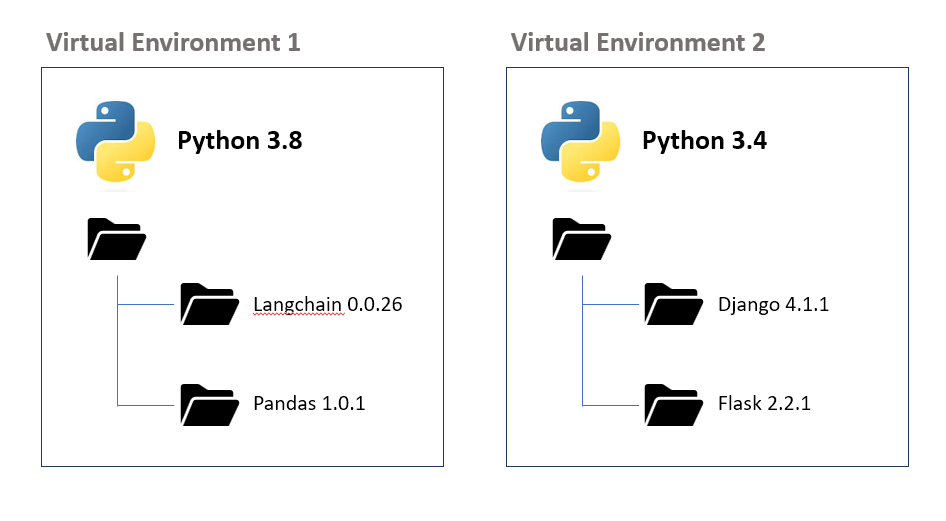
Dependency Isolation: Different projects often require different versions of the same package, which can lead to version conflicts. A virtual environment allows you to isolate your project's dependencies from each other and from system-level packages. Portability: Virtual environments are self-contained and portable, making it easy to move your project between machines or collaborate with others. Reproducibility: By specifying the exact versions of dependencies required by your project, you can ensure that your code will work consistently across different environments.Creating a Python Virtual Environment on Windows
To create a PVE on Windows, follow these steps:
Open Command Prompt or PowerShell as an administrator: Right-click on the Start button (or Press the Windows key + X) and select "Command Prompt (Admin)" or "PowerShell (Admin)". Install Python and pip (if not already installed): If you haven't already, download and install Python from the official Python website. During installation, make sure to include pip in your package selection. Create a new directory for your project: Create a new folder for your project, for example,myproject. Navigate to the project directory: Open Command Prompt or PowerShell and navigate to your project directory using the cd command (e.g., cd C:Projectsmyproject). Install virtualenv (if not already installed): If you haven't already, install virtualenv using pip by running the following command:
pip install virtualenv
virtualenv myvenv
This will create a new directory called myvenv containing your virtual environment.
Activating and Deactivating Your Virtual Environment
To start using your PVE, you'll need to activate it:
Activate the virtual environment: Run the following command: myvenvScriptsactivate
This will activate your virtual environment, indicated by a (myvenv) prefix in your Command Prompt or PowerShell window.
deactivate
Best Practices for Working with Python Virtual Environments on Windows
Create a new directory for each PVE: Keep each PVE in its own separate directory to avoid conflicts between projects. Use consistent naming conventions: Use the same convention (e.g.,myproject-venv) when naming your virtual environments to make them easier to find and manage. Regularly update pip and packages within your PVE: Keep your dependencies up-to-date by running pip install --upgrade and updating your packages regularly.
By following these steps and best practices, you'll be well on your way to using Python Virtual Environments like a pro on Windows!
How many virtual environments does Python have?

I'm happy to respond in English for you!
Python has several built-in and third-party tools that enable you to create virtual environments (also known as venvs or isolated environments). Here's a breakdown of the main ones:
1. venv (built-in, Python 3.3+):
The venv module is a built-in part of Python since version 3.3. It allows you to create isolated Python environments with their own package directories, dependencies, and settings. You can use the command-line tool python -m venv <environment_name> to create a new environment.
2. Conda (Anaconda):
Conda is a popular package manager for Python and other languages. It comes bundled with Anaconda, a distribution of Python and related data science tools. Conda environments are separate from the system Python environment and can be easily managed using commands like conda create and conda activate.
3. Virtualenv (third-party):
Virtualenv is a popular, widely-used tool for creating isolated Python environments. It's been around since 2006! You can install virtualenv via pip: pip install virtualenv. It supports many features, including package installation, dependency management, and environment activation.
4. Pyenv (third-party):
Pyenv is another popular tool for managing multiple Python versions on your system. It allows you to create isolated environments with specific Python version dependencies. You can install pyenv via pip: pip install pyenv.
5. poetry (third-party):
Poetry is a Python package manager that also supports creating virtual environments. It's designed to manage dependencies and isolation for projects, making it a great choice for developers who need more control over their environment.
In summary, Python has several built-in (venv) and third-party tools (conda, virtualenv, pyenv, and poetry) that enable you to create virtual environments. Each tool has its own strengths and use cases, so the best one for your project depends on your specific needs and preferences.
Now, I'll stop typing in English ( Grandma is getting angry ).


