Python docker pip tutorial
Python docker pip tutorial

Python Docker Pip Tutorial
In this tutorial, we will explore how to use Docker to create a containerized environment for running Python applications. We'll also cover the basics of pip, which is the package installer for Python.
Step 1: Install Docker
To get started, you need to install Docker on your machine. You can download and install Docker from the official Docker website.
Step 2: Create a Dockerfile
A Dockerfile is a text file that contains instructions for creating a Docker image. In our case, we'll create a simple hello-world Python application.
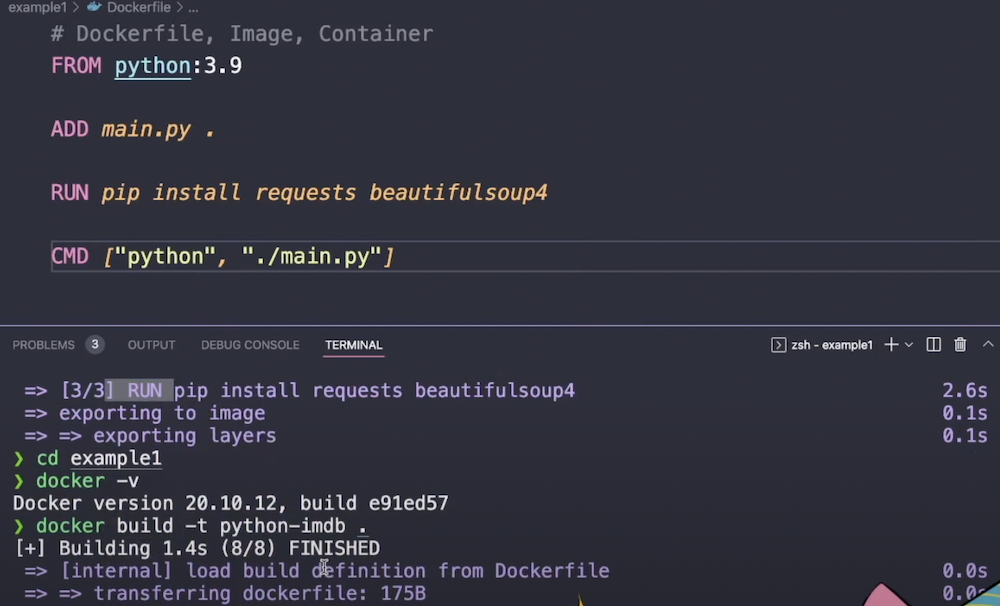
Here's an example Dockerfile:
FROM python:3.9-slim
WORKDIR /app
COPY requirements.txt .
RUN pip install -r requirements.txt
COPY . .
CMD ["python", "app.py"]
Let's break down what each line does:
FROM python:3.9-slim: This tells Docker to use the official Python 3.9 image as a base. WORKDIR /app: This sets the working directory in the container to /app. COPY requirements.txt .: This copies the requirements.txt file from the current directory into the container. RUN pip install -r requirements.txt: This installs all the packages listed in requirements.txt using pip. COPY . .: This copies the rest of our application code (in this case, just one file) into the container. CMD ["python", "app.py"]: This sets the default command to run when we start a new container from this image. In this case, it's running our Python application with the command python app.py.
Step 3: Create a requirements.txt file
Next, let's create a requirements.txt file that lists all the dependencies our application needs:
Flask==2.0.1
requests==2.25.1
This tells pip to install Flask and requests.
Step 4: Build the Docker image
Now that we have our Dockerfile and requirements file, let's build the Docker image:
docker build -t my-python-app .
This command tells Docker to build an image from our Dockerfile using the current directory as the context. The -t flag gives the image a name.
Step 5: Run the Docker container
Finally, let's run a new container from our image:
docker run -it my-python-app
This command tells Docker to start a new container from our my-python-app image and attach a terminal to it ( -i flag) so we can interact with it.
Using pip inside the container
Now that we're inside the container, let's see how we can use pip to install packages:
root@f1aeb0c3e6ad:/app# pip list
Package    Version

Flask      2.0.1
requests   2.25.1
root@f1aeb0c3e6ad:/app# pip install beautifulsoup4
Collecting beautifulsoup4
Downloading beautifulsoup4-4.9.3.tar.gz (259 kB)
|####################################| 100%
Installing collected packages: beautifulsoup4
Successfully installed beautifulsoup4-4.9.3
In this example, we listed the packages installed in our container using pip list. Then, we used pip install to install the beautifulsoup4 package.
Conclusion
That's it! We've created a Docker image for our Python application and used pip inside the container to install packages. This is just a basic example of what you can do with Docker and pip, but I hope it helps you get started on your own projects.
How to install pip in Docker Python?

Installing pip in a Docker container is relatively straightforward. Here's a step-by-step guide on how to do it:
Prerequisites:
You have Docker installed on your machine. You are using a Linux-based operating system (Windows Subsystem for Linux or WSL can also work). You have some basic understanding of Docker and its commands.Step 1: Create a new Docker container
Open your terminal/command prompt and navigate to the directory where you want to create the container. Then, run the following command:
docker run -it --name my-python-container python:3.9-slim
This will create a new Docker container based on the official Python 3.9 image with the slim tag (which is smaller and more lightweight than the regular tag). The -it flag allows you to interact with the container, and --name my-python-container gives it a name so that you can easily refer to it later.
Step 2: Install pip
Once the container is created, you'll need to install pip (Python Package Installer) inside the container. Run the following command:
docker exec -it my-python-container /bin/bash
This will open a new shell session within the container, allowing you to interact with it.
Now, run the following command to install pip:
pip --no-cache-dir install python
This will download and install pip (if it's not already installed) and all its dependencies. The --no-cache-dir flag tells pip to install everything without using any cached packages.
Step 3: Verify the installation
To verify that pip has been successfully installed, run the following command:
docker exec -it my-python-container pip --version
This should display the version of pip you just installed.
That's it! You have now successfully installed pip inside your Docker container. From now on, you can use pip to install Python packages and manage dependencies within that container.
Important note:
Keep in mind that this is a one-time installation process for each new container created from the same base image. If you want to preserve the installation across multiple containers or even between different Docker versions, consider creating an official Python package repository (like pipenv) and using it to install your packages instead of running manual installations inside individual containers.
I hope this helps! Let me know if you have any further questions.


