python kubernetes client example
python kubernetes client example

Here is a Python example using the Kubernetes client library (kubernetes-client-python) to interact with a Kubernetes cluster:
Prerequisites:

kubernetes package:

pip install kubernetes
kubectl config use-context <cluster-name>). Replace <username> and <password> with your actual username and password.
Example code:
import osfrom kubernetes import client, config
Load configuration from the default location (~/.kube/config)config.load_kube_config()
Create a V1Pod object to represent our deploymentapi_instance = client.AppsV1Api()
namespace = 'default' # Replace with your desired namespace
pod_name = 'my-pod' # Replace with your desired pod name
Set the environment variables for our podenv_vars = [
{"name": "FOO", "value": "bar"},
{"name": "BAZ", "value": "qux"}
]
Create a container specification for our podcontainer_spec = client.V1Container(
name="my-container",
image="nginx:latest",
env=env_vars,
ports=[client.V1ContainerPort(container_port=80)]
)
Set up the pod's metadata (name, namespace, labels)pod_meta = client.V1ObjectMeta(name=pod_name, namespace=namespace, labels={"app": "my-app"})
Create a Pod object using our V1Pod and container specpod_obj = client.V1Pod(
api_version="v1",
kind="Pod",
metadata=pod_meta,
spec=client.V1PodSpec(containers=[container_spec])
)
try:
Call the Kubernetes API to create the podresponse = api_instance.create_namespaced_pod(namespace, pod_obj)
print(f"Created pod {pod_name} in namespace {namespace}: {response.status}")
except client.exceptions.ApiException as e:
print(f"Error creating pod: {e.status} {e.reason}")
finally:
Clean up (optional)if not config.api_client.configuration.ssl_ca_certs:
config.api_client.configuration.ssl_ca_certs = None
print("Example complete!")
This example demonstrates the following:
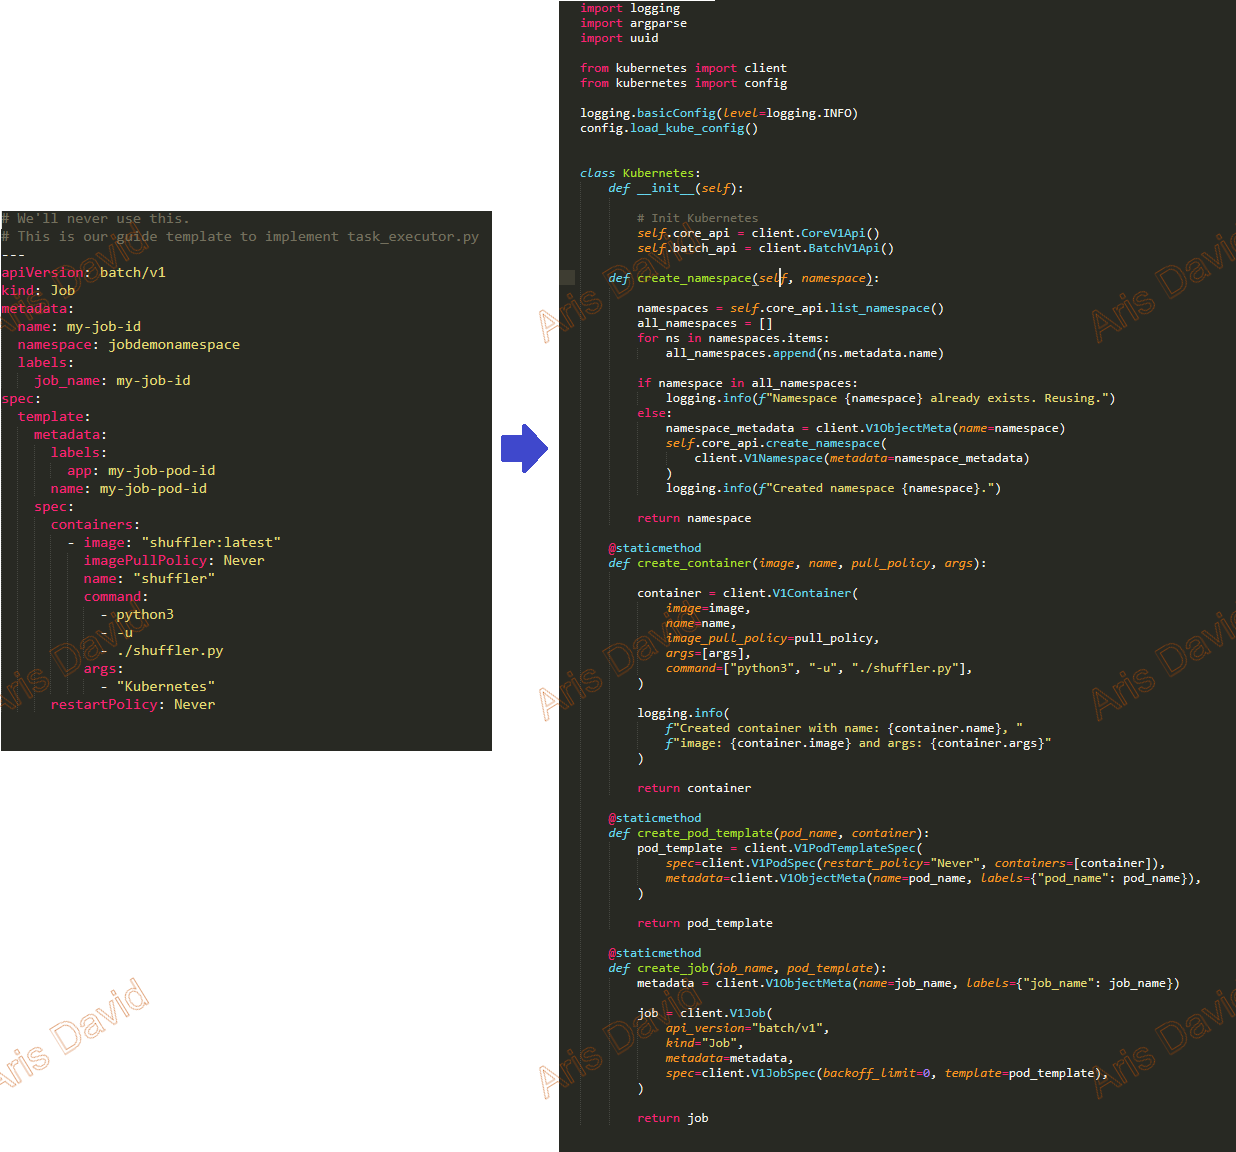
Loading configuration from the default location (~/.kube/config). Creating a V1Pod object to represent our deployment. Setting environment variables for our pod using env_vars. Defining a container specification using container_spec, including image, ports, and environment variables. Setting up the pod's metadata (name, namespace, labels) using pod_meta. Creating a Pod object using our V1Pod and container spec. Calling the Kubernetes API to create the pod using create_namespaced_pod.
Note:
Replace<username> and <password> with your actual username and password. Modify the code to fit your specific use case (e.g., deployment, service, or other resource type). For a more comprehensive example, check out the official Kubernetes Python client library documentation.Python kubernetes example

I'd be happy to help!
Here's an example of how you can use Python with Kubernetes:
Running a Python Application on Kubernetes
Let's say we have a simple Python web application that serves a "Hello World" page. We'll create a deployment for this application in Kubernetes.
First, create a requirements.txt file and add the necessary dependencies:
flask
Create a app.py file with the following code:
from flask import Flask
app = Flask(name)
@app.route('/')
def hello_world():
return 'Hello World!'
if name == 'main':
app.run(debug=True, port=80)
This is a simple Flask application that serves a "Hello World" page at the root URL (/).
Create a Kubernetes Deployment
Next, create a deployment.yaml file with the following content:
apiVersion: apps/v1
kind: Deployment
metadata:
name: python-app
spec:
replicas: 2
selector:
matchLabels:
app: python-app
template:
metadata:
labels:
app: python-app
spec:
containers:

name: python-app

image: python:3.9-slim
command: ["python"]
args: ["app.py"]
ports:

containerPort: 80
This YAML file defines a deployment named python-app with two replicas (i.e., two instances of the application). The template section specifies the container configuration, including the image (python:3.9-slim), command (python), and args (app.py). The ports section exposes port 80 from the container.
Apply the Deployment to Kubernetes
Run the following command to apply the deployment YAML file to your Kubernetes cluster:
kubectl apply -f deployment.yaml
This will create a new deployment named python-app with two replicas. You can verify that the deployment is running by using the kubectl get command:
kubectl get deployments
You should see an output like this:
NAME            DESIRED   CURRENT   READY   UP-TO-DATE   AVAILABLE   NODE SELECTOR   LAST UPDATED          AGE
python-app     2         2         0        True          1                           34s       35s
Verify the Application
To verify that the application is running, you can use the kubectl command to get the URL of the deployment:
kubectl get deployments python-app -o jsonpath='{.spec.template.spec.containers[0].ports[0].hostPort}'
This will give you the host port number (in this case, 32769). You can then use a tool like curl to access the application from outside the Kubernetes cluster:
curl http://localhost:32769/
You should see the "Hello World!" page returned in your browser.
Scaling and Updating the Deployment
Kubernetes makes it easy to scale and update deployments. You can use the kubectl scale command to increase or decrease the number of replicas:
kubectl scale deployment python-app --replicas=3
This will increase the number of replicas to 3. You can also use the kubectl apply command with a new YAML file that updates the existing deployment:
apiVersion: apps/v1
kind: Deployment
metadata:
name: python-app
spec:
replicas: 2
selector:
matchLabels:
app: python-app
template:
metadata:
labels:
app: python-app
spec:
containers:

name: python-app

image: python:3.9-slim
command: ["python"]
args: ["app.py"]
ports:

containerPort: 80
This YAML file updates the existing deployment to have two replicas, and then applies it using the kubectl apply command.
That's a basic example of how you can use Python with Kubernetes!


