Python travis ci example
Python travis ci example
I'd be happy to provide a detailed example of using Travis CI with Python!
What is Travis CI?
Travis CI (Continuous Integration) is a service that automatically builds, tests, and deploys your code whenever you push changes to your GitHub repository. This ensures that your codebase remains stable and healthy by detecting issues early on in the development process.
Setting up Travis CI with Python
To set up Travis CI for your Python project, follow these steps:
Create a .travis.yml file: In the root directory of your project, create a new file named.travis.yml (note the dot at the beginning). This file contains configuration settings for Travis CI.
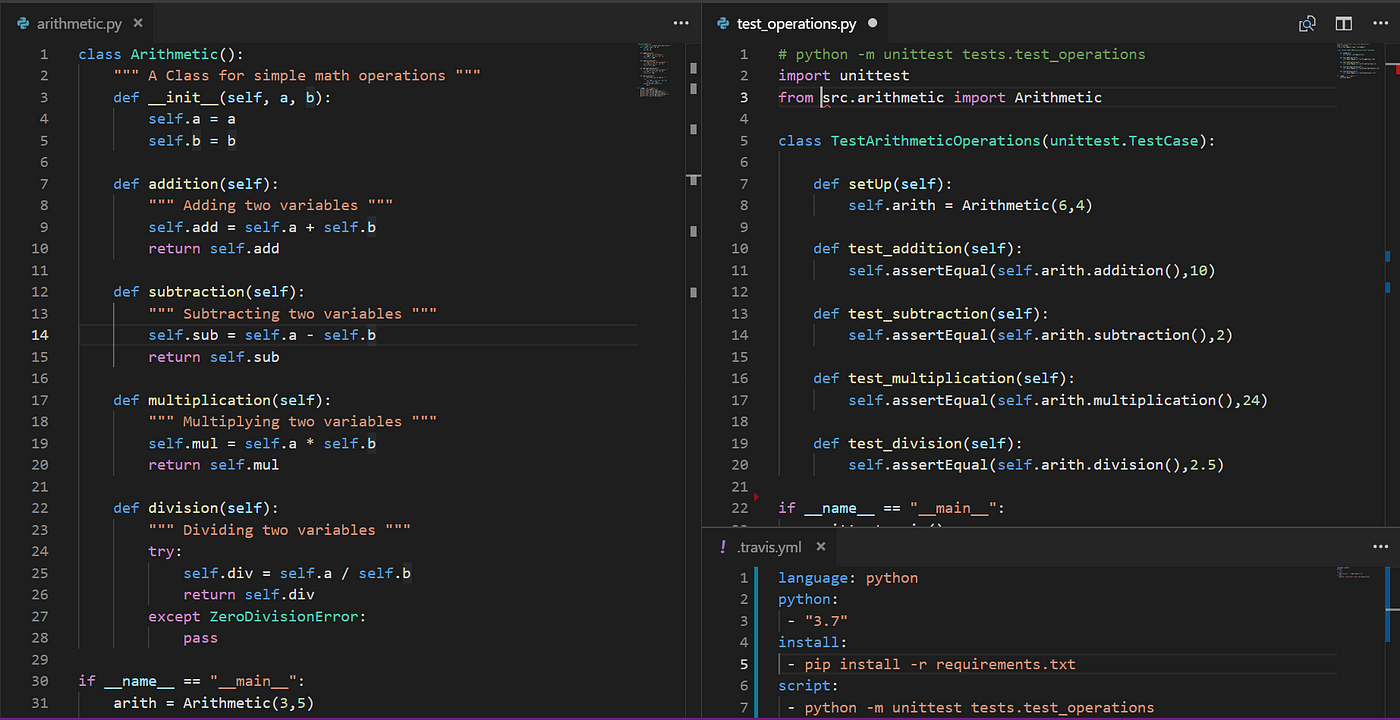
Here's an example .travis.yml file for a Python project:
language: pythonpython:
"3.8"install:
pip install -r requirements.txtscript:
pytest tests/after_success:
coverage reportbranches:
only:
master
Let's break down what each section does:
language: python: Specifies that this is a Python project.
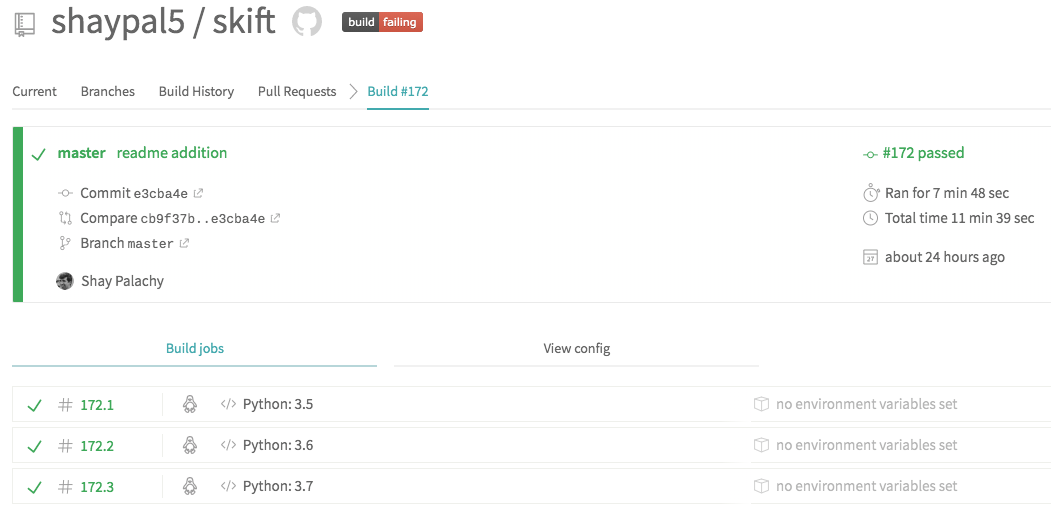
python: 3.8: Tells Travis CI to use Python 3.8 as the interpreter for your tests.
install: Installs dependencies listed in requirements.txt using pip. script: Runs the test suite using pytest, which is installed earlier in the pipeline. after_success: Generates a coverage report after successful builds.
branches: only: master: Limits the build to only occur when changes are pushed to the master branch. Configure your .gitignore file: Travis CI will automatically create a .gitignore file for you if it doesn't already exist in your project's root directory. This file specifies which files and directories should be ignored by Git, ensuring that sensitive information (like API keys or database credentials) remains private. Create a requirements.txt file: In your project's root directory, create a new file named requirements.txt. This file lists all the dependencies required for your project to run.
Here's an example requirements.txt file:
pytest
requests
Flask
SQLAlchemy
.travis.yml, .gitignore, and requirements.txt files, as well as any new code or updates you made to your project. Then, push the changes to your GitHub repository.
How Travis CI Works
When you push changes to your GitHub repository, Travis CI automatically detects the commit and runs a build process for your project. Here's what happens during each step:
Build preparation: Travis CI sets up an isolated environment with the specified Python interpreter and installs dependencies fromrequirements.txt. Code execution: Travis CI runs your tests using pytest, which provides detailed reports on any failed tests. Coverage reporting: If all tests pass, Travis CI generates a coverage report showing the percentage of your codebase covered by unit tests. Deployment: If your build is successful, you can configure Travis CI to deploy your project to a hosting platform or a continuous delivery environment.
Benefits of using Travis CI
Automated testing: Ensures that your codebase remains stable and healthy by detecting issues early on in the development process. Continuous Integration: Provides a reliable way to test and build your project for each commit, ensuring that changes don't break the entire project. Reduced errors: Identifies and fixes issues promptly, reducing the likelihood of errors making it into production.Conclusion
In this example, we've set up Travis CI to automate testing, deployment, and coverage reporting for our Python project. By integrating Travis CI into your development workflow, you can ensure that your codebase remains stable, healthy, and well-tested – leading to reduced errors, improved collaboration, and faster time-to-market.
Remember, a strong test suite is the backbone of any successful software development project!
Python travis ci tutorial
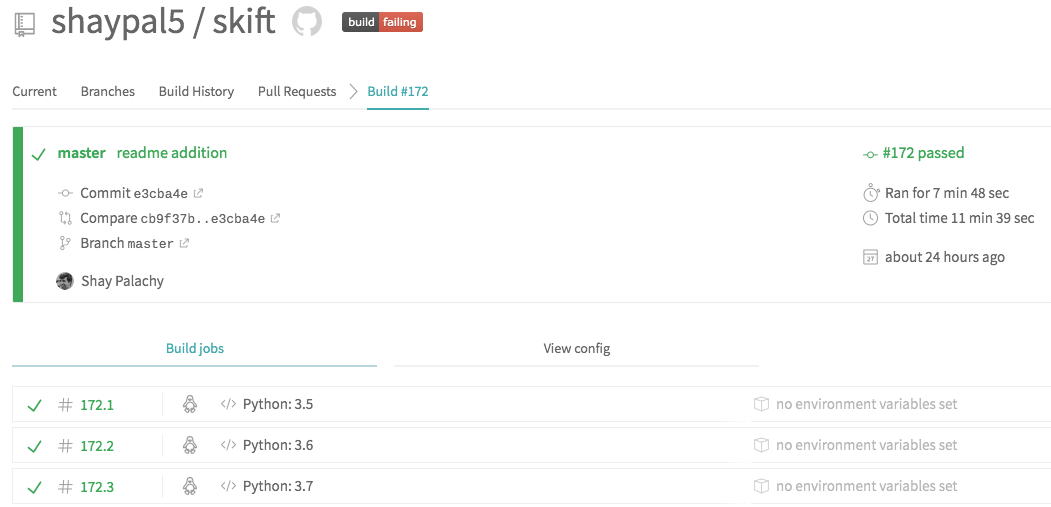
Here's a comprehensive guide to setting up Travis CI for your Python project.
What is Travis CI?
Travis CI (Continuous Integration) is a free, hosted continuous integration service for the open-source community. It provides automated testing and deployment of code changes across multiple platforms.
Why use Travis CI for my Python project?
Step-by-Step Guide to Setting up Travis CI for Python
Create a GitHub Repository: Create a new repository for your Python project on GitHub. Create a.travis.yml File: In the root of your project directory, create a file named .travis.yml. This file contains the configuration for your Travis CI builds. Configure Your .travis.yml File: Start with the basic configuration:
Specify the Python version you want to use:language: python
Install dependencies using pip:python: 3.8
Configure Your Testing Framework:before_install: pip install -r requirements.txt
If you're using a testing framework like Pytest or Unittest, specify it in your .travis.yml file:
Push Changes to GitHub: Make sure to commit and push all changes to your GitHub repository.script: pytest
How Travis CI Works
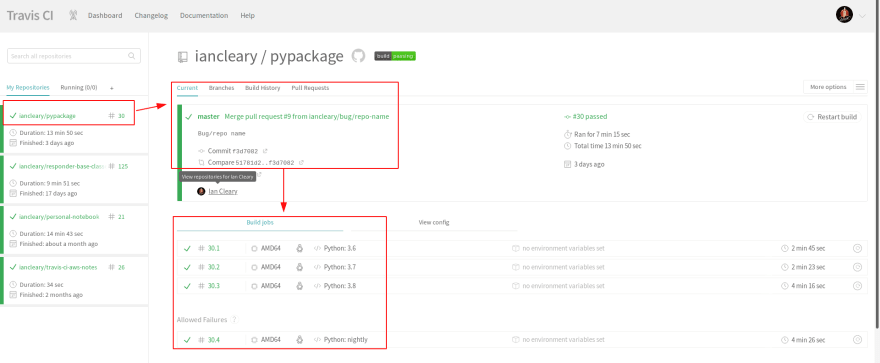
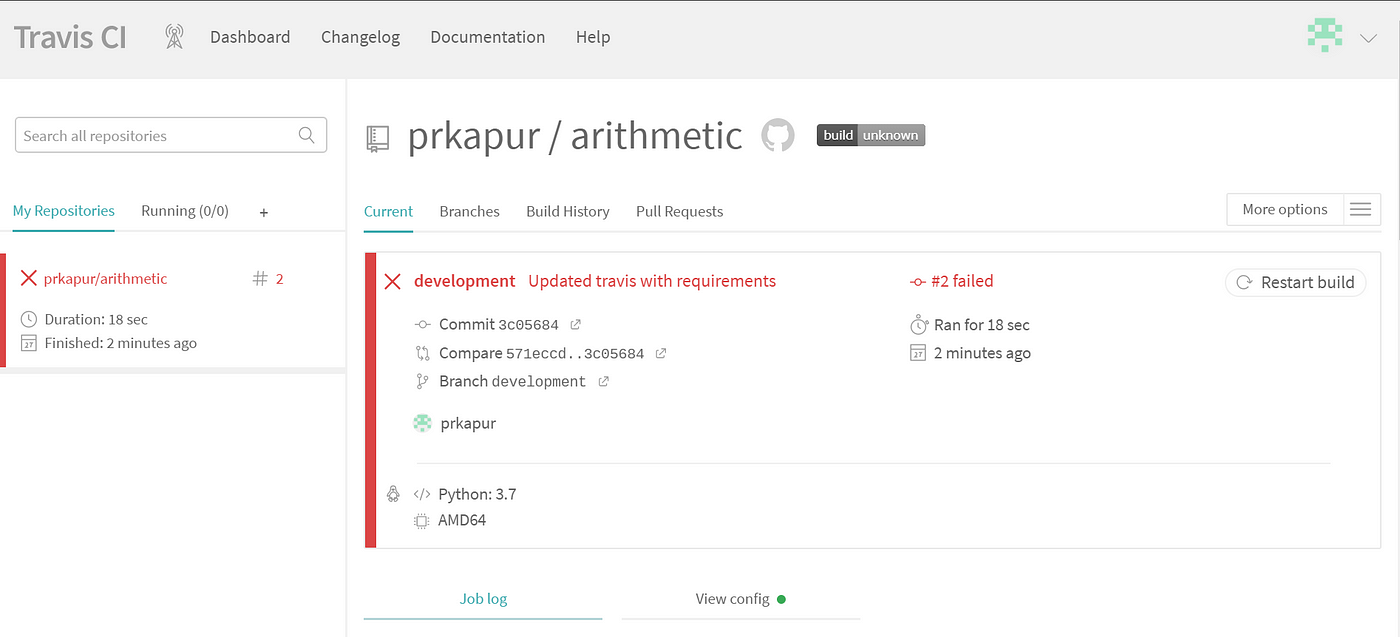
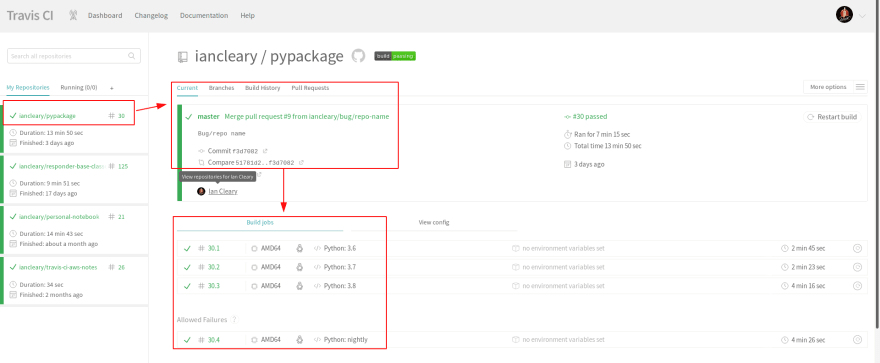
GitHub Webhooks: When you push changes to your GitHub repository, a webhook is triggered, sending the update to Travis CI. Travis CI Builds: Travis CI creates an isolated environment for your project, installs dependencies, and runs the tests specified in your.travis.yml file. Test Results: The test results are displayed on the Travis CI dashboard, indicating whether the build was successful or failed.
Tips and Tricks
Usebefore_install to install dependencies that aren't included in requirements.txt. Use script to specify commands for your build process. Use env to set environment variables for your builds. You can customize your build environment by specifying the Python version, installing specific packages, or using a specific database.
Conclusion
By setting up Travis CI for your Python project, you'll be able to automate testing, ensure code quality, and simplify collaboration. With this comprehensive guide, you're ready to start using Travis CI for your projects!


