Python serverless example
Python serverless example
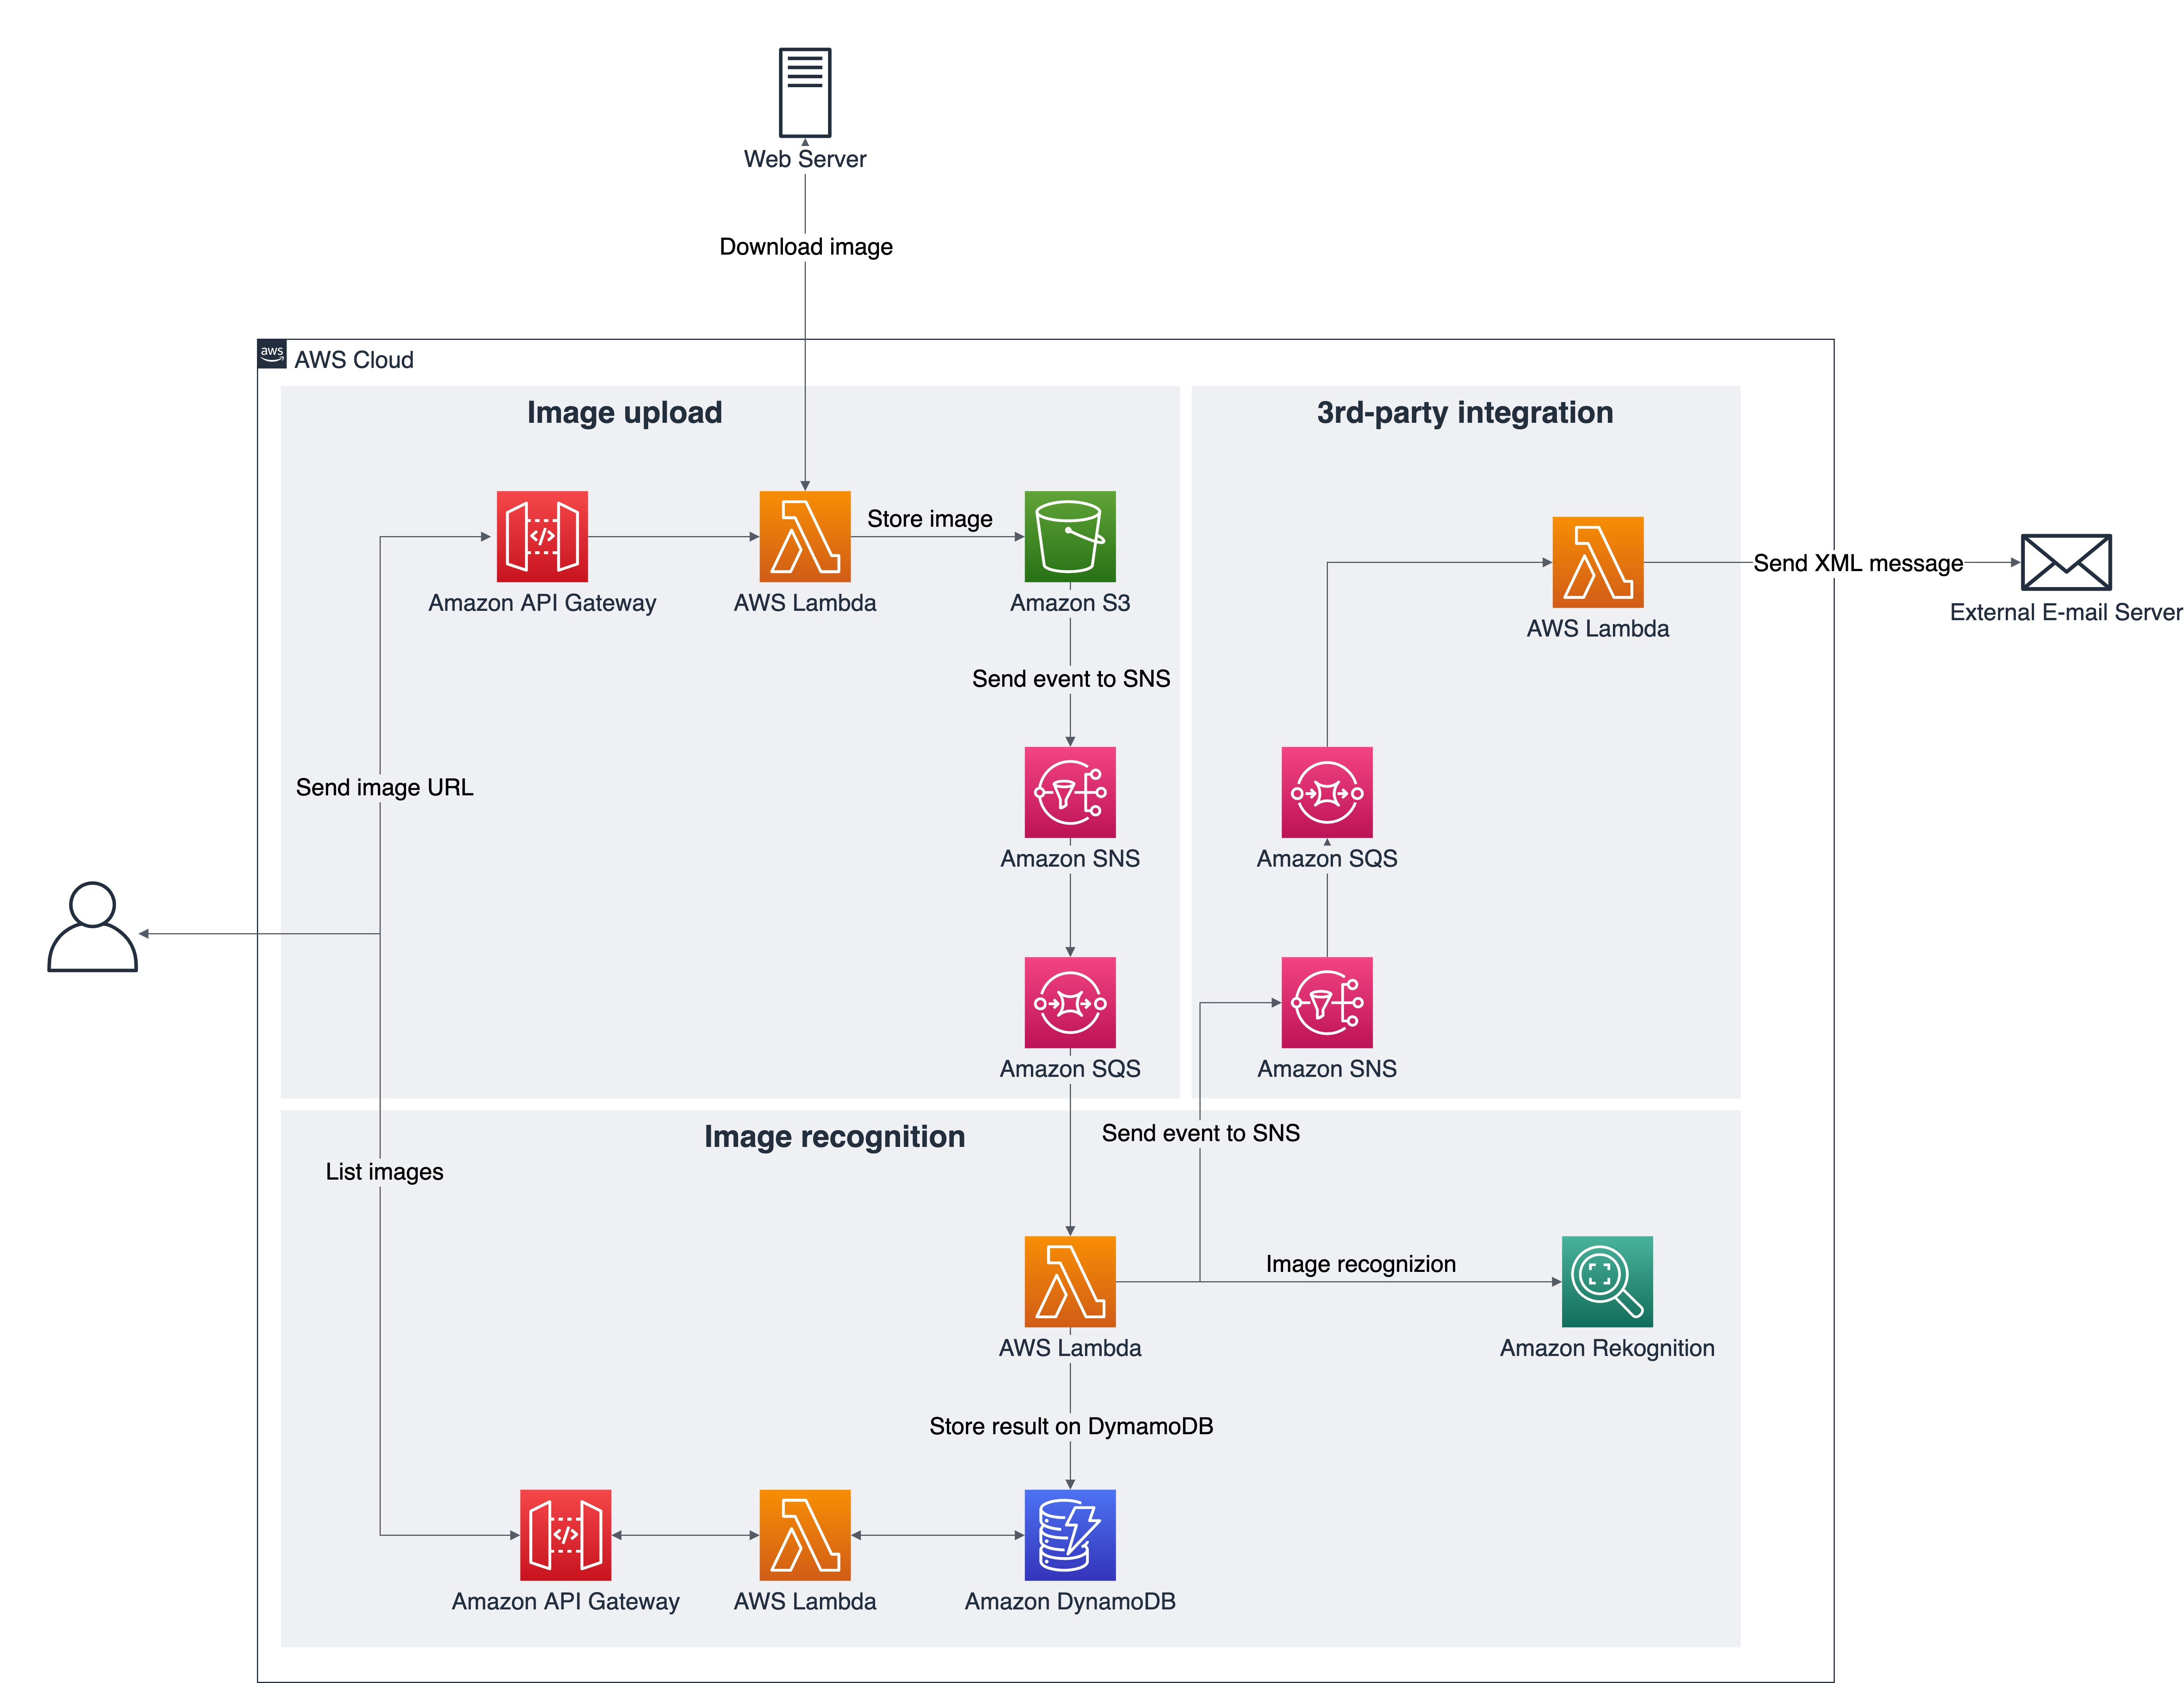
Here is an example of a Python-based serverless application:
Serverless computing is a cloud computing model where the cloud provider manages the infrastructure and dynamically allocates computing resources as needed. With this approach, you don't have to manage any servers or worry about scaling your application.
In this example, we will create a simple serverless API using AWS Lambda and API Gateway. This API will respond to GET requests and return a message in JSON format.
Here are the steps:
Install the necessary libraries:You can install them by running the following command:
pip install boto3
This role should have the necessary permissions for your Lambda function. You can do this by navigating to the AWS Management Console, selecting the IAM service, and then clicking on "Roles".
Create a Lambda function:Create a new Lambda function with Python as the runtime. You'll need to give it a name, such as my-serverless-api. Set the handler to index.handler, which will be our entry point.
Here's an example of what the code might look like:
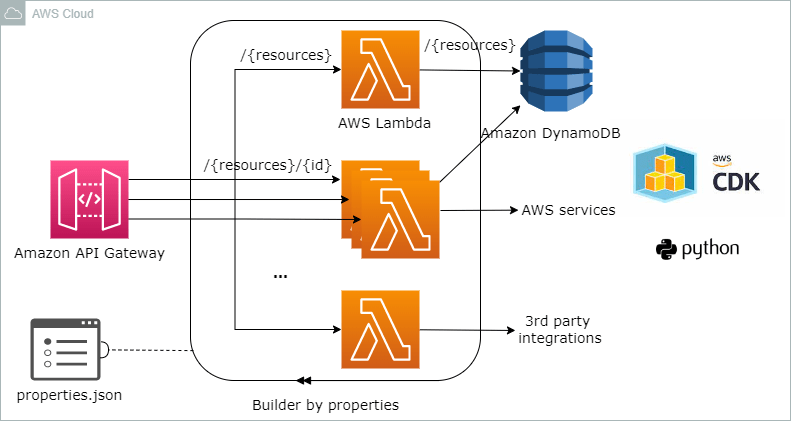
import boto3
dynamodb = boto3.resource('dynamodb')
table_name = 'my-table'
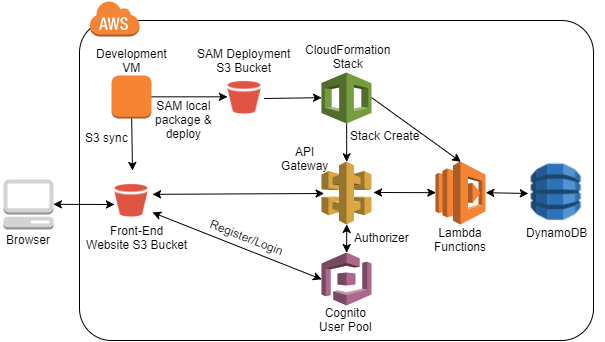
def lambda_handler(event, context):
table = dynamodb.Table(table_name)
if event['httpMethod'] == 'GET':

Return a message in JSON format
return {
'statusCode': 200,
'body': JSON.stringify({
"message": "Hello from serverless!"
})
}
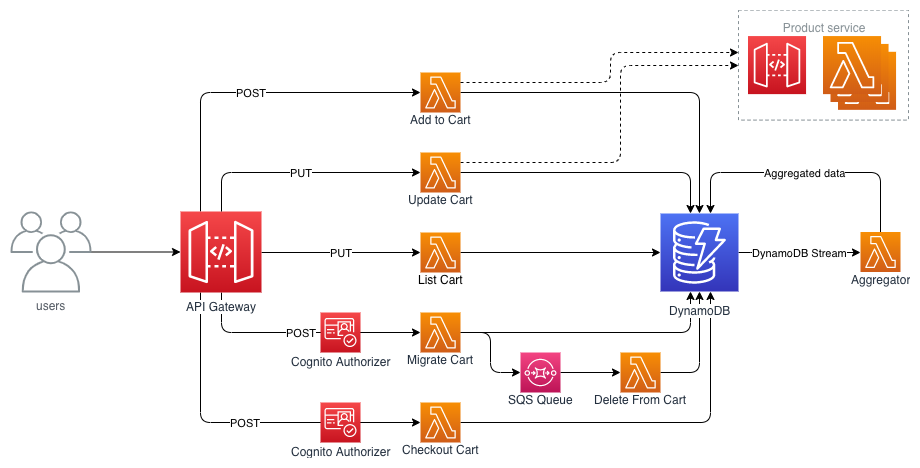
In the AWS Management Console, select the API Gateway service and click on "Create API". Choose the REST API option and give it a name, such as my-serverless-api.
Click on the "Integration Request" button in the "Resources" tab. Then, select "Lambda Function" as the integration type and choose your Lambda function from the list.
Test your API:To test your API, you can use a tool like curl or Postman to send a GET request to your API Gateway endpoint.
Here's an example of how this might look:
curl -XGET https://execute-api.us-east-1.amazonaws.com/my-serverless-api/
Use CloudWatch to monitor the performance and errors of your serverless application. You can also use AWS X-Ray to visualize the performance of your function.
This example demonstrates a simple serverless API that responds to GET requests and returns a message in JSON format. Of course, this is just the tip of the iceberg when it comes to what's possible with serverless computing!
Some benefits of using Python for serverless computing include:
Fast execution: Python's Just-In-Time (JIT) compiler ensures that your code executes quickly. Low memory usage: Python's garbage collector helps keep memory usage low, making it a good choice for serverless applications. Large community: Python has a large and active community, which means there are many resources available to help you learn and troubleshoot.I hope this example gives you a sense of what it's like to build a serverless application using Python!
Python Serverless Vercel
Here's the information you're looking for:
Vercel is a platform that allows you to deploy and host serverless applications with ease. One of its notable features is its integration with Python, allowing developers to create and deploy Python-based projects using their favorite frameworks.
To get started with Vercel and Python, you'll need to have the following installed on your machine:
Node.js: This is a runtime environment for JavaScript that's also used by Vercel. You can download it from the official website. Yarn or npm: These are package managers that help you install dependencies for your project. You can choose either one, but if you're already familiar with npm, you might want to stick with that. Python: This is the programming language you'll be using to create your serverless application. Make sure it's installed and up-to-date on your machine.Once you have these tools in place, here are the general steps to deploy a Python-based project on Vercel:
Create a new directory for your project and initialize it with npm (or yarn) by runningnpm init or yarn init. This will help set up your project's package.json file. Install the required dependencies for your Python project using pip. For example, if you need to install Flask or Django, run pip install flask or pip install django. Create a new file called vercel.json in the root of your project directory. This file contains configuration settings that Vercel uses to deploy your application. In your vercel.json file, add the following lines:
Update your{"name": "your-app-name",
"builds": [
{
"src": "path/to/your/python/file.py",
"use": "@vercel/builder-python"
}
]
}
package.json file to include the necessary scripts for Vercel. For example, you might add a script called build that runs your Python file and outputs it as an HTML file:
Create a new file for your Python application in the same directory where you initialized your project with npm or yarn. Write your serverless Python code in this file, using frameworks like Flask or Django if needed. Run{"scripts": {
"build": "python path/to/your/python/file.py > output.html"
}
}
npm run build (or yarn run build) to compile and package your Python application. Push your changes to GitHub and create a new deployment on Vercel. Once the deployment is successful, you can view your serverless application by clicking the "Deployed" link in your Vercel dashboard.
That's it! With these steps, you should be able to deploy a Python-based project using Vercel and enjoy the benefits of serverless computing.


