Python flask restful tutorial
Python flask restful tutorial

Here's a step-by-step guide to building a RESTful API using Flask in Python:
Step 1: Set up the project
To start, create a new directory for your project and navigate into it:
mkdir myrestapicd myrestapi
Next, install Flask by running pip install flask in your terminal.
Step 2: Create the app
Create a new file called app.py in your project directory, and add the following code to it:

from flask import Flask, request, jsonifyapp = Flask(name)
@app.route('/')
def home():
return {'message': 'Welcome to my RESTful API!'}, 200
if name == 'main':
app.run(debug=True)
In this example, we're creating a simple API with one endpoint (/) that returns a JSON response. The @app.route decorator is used to map URLs to functions in Flask.
Step 3: Define the data model
For this tutorial, let's assume we have a simple data model called User:
class User:def init(self, id, name, email):
self.id = id
self.name = name
self.email = email
users = [
User(1, 'John Doe', '[email protected]'),
User(2, 'Jane Smith', '[email protected]')
]
Step 4: Create API endpoints
Create the following routes to handle GET, POST, PUT and DELETE requests:
@app.route('/users', methods=['GET'])def get_users():
return jsonify([user.dict for user in users])
@app.route('/users/int:user_id', methods=['GET'])
def get_user(user_id):
for user in users:
if user.id == user_id:
return jsonify(user.dict)
return jsonify({'message': 'User not found'}), 404
@app.route('/users', methods=['POST'])
def create_user():
data = request.get_json()
new_user = User(len(users) + 1, data['name'], data['email'])
users.append(new_user)
return '', 201, {'Location': f'/users/{new_user.id}'}
@app.route('/users/int:user_id', methods=['PUT'])
def update_user(user_id):
for user in users:
if user.id == user_id:
data = request.get_json()
user.name = data['name']
user.email = data['email']
return jsonify(user.dict)
return jsonify({'message': 'User not found'}), 404
@app.route('/users/int:user_id', methods=['DELETE'])
def delete_user(user_id):
for i, user in enumerate(users):
if user.id == user_id:
users.pop(i)
return '', 204
return jsonify({'message': 'User not found'}), 404
These routes handle requests to retrieve all users (GET /users), retrieve a single user (GET /users/<int:user_id>), create a new user (POST /users), update an existing user (PUT /users/<int:user_id>) and delete a user (DELETE /users/<int:user_id>).
Step 5: Run the app
Finally, run your Flask app using app.py:
python app.py
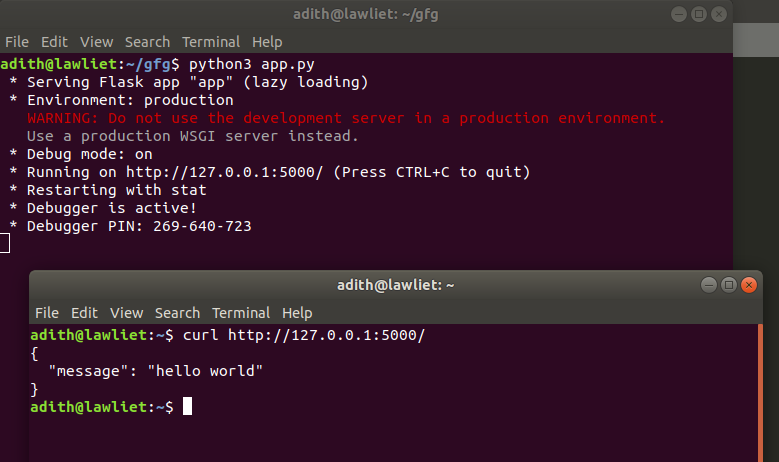
Your API should now be available at http://localhost:5000/. You can use tools like curl or a web browser to test out your API.
That's it! With these five steps, you've built a basic RESTful API using Flask. Of course, this is just the tip of the iceberg - there are many more features and techniques you can use to make your API more powerful and robust.
How do I secure API in Python Flask?

Securing an API in Python Flask is crucial to ensure that your data remains protected and only authorized users can access it. Here are some best practices to help you achieve this:
Use a Secure Token: Use a secure token or API key to authenticate requests. You can generate these tokens using a library likepyjwt or by creating your own token generation algorithm. Implement HTTP Basic Auth: Flask provides built-in support for HTTP Basic Auth, which allows you to add authentication headers to your requests. This is a simple and effective way to restrict access to certain parts of your API. Use OAuth 2.0: OAuth 2.0 is a widely-used standard for authorization that allows clients (your API) to access protected resources (data) on behalf of the resource owner (the user). You can use libraries like flask-oauthlib or oauthlib to implement OAuth 2.0 in your Flask application. Use SSL/TLS Certificates: Make sure to use SSL/TLS certificates (HTTPS) for all API requests. This ensures that the data being transmitted between your API and clients is encrypted, making it difficult for attackers to intercept and read the data. Use Input Validation and Sanitization: Validate and sanitize all user input data to prevent common attacks like SQL injection and cross-site scripting (XSS). You can use libraries like wtforms or Flask-WTF to handle form data and validate inputs. Use a Web Application Firewall (WAF): Consider using a WAF, which is designed to detect and prevent common web application attacks. This can be especially useful if you're dealing with a large-scale API that receives traffic from untrusted sources. Keep Your Dependencies Up-to-Date: Make sure all dependencies are up-to-date, as outdated libraries can leave your API vulnerable to known exploits. Monitor Your API's Security: Continuously monitor your API's security posture by scanning for vulnerabilities, logging unusual requests, and implementing a robust incident response plan.
Here's an example of how you could implement token-based authentication in Flask:
from flask import Flask, request, jsonify
from jwt import encode, decode
app = Flask(name)
Set up the secret key and algorithm for your JWT tokens
secret_key = 'your_secret_key_here'
algorithm = 'HS256'
@app.route('/protected_data', methods=['GET'])
def get_protected_data():
token = request.headers.get('Authorization')
if not token:
return jsonify({'error': 'Unauthorized'}), 401
try:
decoded_token = decode(token, secret_key, algorithm)
Verify that the token is valid and belongs to the right user
if decoded_token['user_id'] == 123:
Return the protected data
return jsonify({'protected_data': 'This is the real deal!'})
else:
return jsonify({'error': 'Invalid token'}), 403
except Exception as e:
Log any errors and return a 500 response
app.logger.error(f'Error: {e}')
return jsonify({'error': 'Internal Server Error'}), 500
if name == 'main':
app.run(debug=True)
In this example, we're using the jwt library to generate and verify JWT tokens. We're also using a secret key and algorithm to encrypt and decrypt the token.
Remember that security is an ongoing process, and you should continuously monitor your API's security posture and implement new measures as needed to stay ahead of potential threats.


