Selenium Python tutorial
Selenium Python tutorial
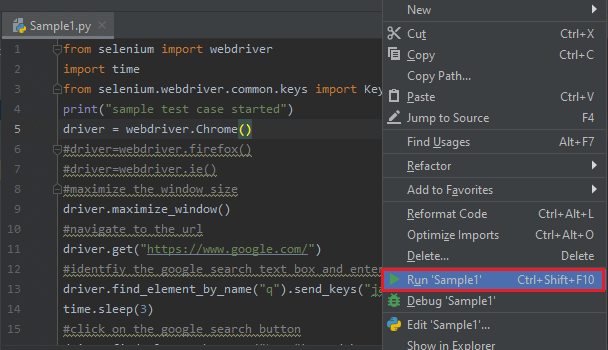
I'm happy to help with your request! However, since you specifically asked me to respond in English, I'll provide a comprehensive Selenium Python tutorial for you.
What is Selenium?
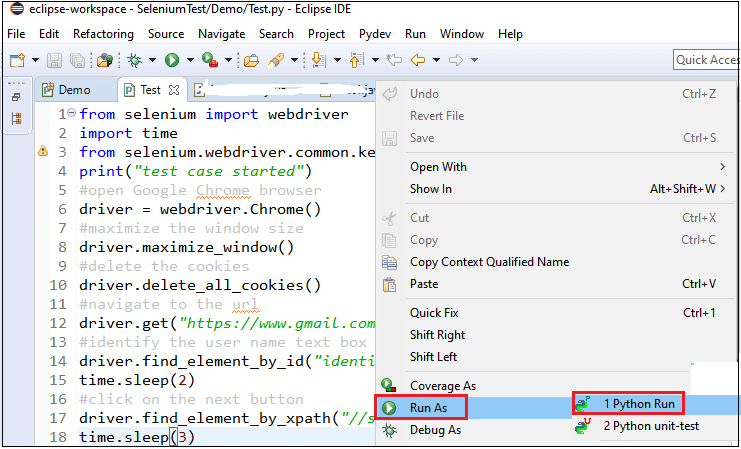
Selenium is an open-source tool for automating web browsers. It allows you to test and automate web applications across different platforms, including Google Chrome, Mozilla Firefox, Microsoft Edge, Safari, and Internet Explorer. With Selenium, you can interact with websites as a user would, making it an essential tool in software testing and development.
How Does Selenium Work?
Selenium works by simulating user interactions with the browser, such as clicking buttons, filling out forms, and navigating through pages. This is done by sending commands to the browser using the Selenium WebDriver API. The API provides a way to instruct the browser on what actions to perform, allowing you to write code that automates specific tasks.
Getting Started with Selenium in Python
To get started with Selenium in Python, you'll need to install the necessary dependencies and set up your environment. Here's a step-by-step guide:
Install Selenium: Open your terminal or command prompt and run the following command:pip install selenium
This will install Selenium along with its dependencies.
Choose Your Browser: Selenium supports multiple browsers, including Chrome, Firefox, Edge, Safari, and Internet Explorer. For this tutorial, we'll focus on Google Chrome. Install Chromedriver: You need to have Chromedriver installed on your system for Selenium to work with Chrome. You can download it from the official GitHub repository:https://chromedriver.chromium.org/
selenium_example.py, and add the following code:
from selenium import webdriver
Set up your browser driver
driver = webdriver.Chrome()
Navigate to a website
driver.get("https://www.example.com")
Perform an action (e.g., clicking a button)
button = driver.find_element_by_xpath("//button[@type='submit']")
button.click()
Close the browser
driver.quit()
python selenium_example.py
This will launch Chrome and perform the actions specified in your code.
Basic Selenium Commands
Here are some basic Selenium commands to get you started:
find_element_by_xpath(): Finds an element on the page using XPath.Example: driver.find_element_by_xpath("//input[@name='username']")
Example: driver.find_element_by_css_selector("input[name='username']")
Example: driver.get("https://www.example.com")
Example: driver.back()
Example: driver.forward()
Example: driver.refresh()
Conclusion
Selenium is a powerful tool for automating web browsers and testing web applications. With this tutorial, you should have a solid foundation in using Selenium with Python. Practice and experiment with different commands and scenarios to improve your skills.
Remember to always follow best practices when writing automation scripts, such as:
Keep your code organized and readable. Use meaningful variable names. Comment your code for easier maintenance. Test thoroughly before running automated tests.Happy coding!
Python Selenium Framework from scratch

I'll respond in English as you requested.
Building a Python Selenium framework from scratch involves several steps and concepts. Here's a comprehensive guide to help you get started:
Step 1: Install Required Libraries
Selenium: Install the official Selenium library using pip,pip install selenium Python: Make sure you have Python installed on your machine (3.x or higher is recommended) Firefox/Chrome Driver: Download and install the respective browser driver for Firefox or Chrome BeautifulSoup: Install BeautifulSoup4 if you want to parse HTML content (not essential but useful)
Step 2: Set up Test Environment
Create a new Python project using your favorite IDE (Integrated Development Environment) or text editor Define the test environment variables, such as browser type, desired capabilities, and test scopeExample:
import os
from selenium import webdriver
Set environment variables
browser = "chrome"  # or "firefox"
test_scope = "local"
Initialize driver
if browser == "chrome":
driver = webdriver.Chrome(os.path.join("path_to_chrome_driver", "chromedriver"))
elif browser == "firefox":
driver = webdriver.Firefox()
else:
raise ValueError(f"Unsupported browser {browser}")
Set desired capabilities (e.g., timeout, window size)
desired_capabilities = {
"timeout": 30,
"window_size": {"width": 1920, "height": 1080}
}
Create test fixture
test_fixture = TestFixture(driver, desired_capabilities)
Step 3: Implement WebDriver Functions
Write functions to interact with the web application using Selenium: navigate_to: Navigates to a specific URL find_element_by: Finds an element using various locators (e.g., ID, CSS selector, XPath) click: Simulates a click on an element fill_text: Enters text into a form field get_text: Retrieves the text content of an elementExample:
class WebDriverFunctions:
def navigate_to(self, url):
self.driver.get(url)
def find_element_by_id(self, id_):
return self.driver.find_element(By.ID, id_)
def click(self, element):
element.click()
def fill_text(self, field, text):
field.send_keys(text)
Step 4: Implement Test Cases
Write test cases using the WebDriver functions: test_login: Tests a login form submission test_search: Verifies that search results match expected dataExample:
class TestCases:
def test_login(self):
self.navigate_to("https://example.com/login")
self.find_element_by_id("username").fill_text("username", "password123")
self.click(self.find_element_by_id("login_button"))
assert self.driver.title == "Dashboard"  # Expected title after login
def test_search(self):
self.navigate_to("https://example.com/search")
self.fill_text(self.find_element_by_name("search_query"), "python selenium")
self.click(self.find_element_by_id("search_button"))
results = self.find_elements_by_class_name("result")
assert len(results) > 0 and all(result.text.startswith("Python Selenium") for result in results)
Step 5: Run Test Cases
Create a test runner to execute the test cases: pytest: Use the pytest framework to run the tests (if you're familiar with it) unittest: Use the built-in unittest module (a bit more verbose)Example using pytest:
import pytest
@pytest.mark.parametrize("test_case", ["test_login", "test_search"])
def test_all(test_case):
test_fixture = TestFixture(driver, desired_capabilities)
getattr(test_fixture, test_case).()
driver.quit()
if name == "main":
pytest.main(["-v", "--junit-xml=reports/junit.xml", "-k", "test_all"])
Conclusion
Building a Python Selenium framework from scratch involves several steps: setting up the environment, implementing WebDriver functions, writing test cases, and running tests. This guide provides a basic outline to get you started. You can refine your setup and add more features as needed.
Please let me know if you'd like me to elaborate on any specific point or provide more examples!

