Python websocket proxy
Python websocket proxy

A WebSocket proxy written in Python! That's a fascinating project. Here's an overview of how you can implement it:
What is a WebSocket Proxy?
A WebSocket proxy, also known as a reverse proxy or a relay, acts as an intermediary between a client and a server that uses WebSockets for communication. Its primary goal is to forward messages from the client to the server while handling any issues related to network connectivity, SSL/TLS encryption, or authentication.
Why Do We Need a WebSocket Proxy?
Imagine you have a client-side application (e.g., a web browser) that connects to a WebSocket server. If this connection becomes unreliable due to network issues or the server goes down, your application will break. A WebSocket proxy can help alleviate these problems by:
Load balancing: Distribute incoming traffic across multiple servers to improve performance and scalability. Connection pooling: Manage connections between clients and servers to reduce overhead and improve reliability. SSL/TLS encryption: Encrypt communication between the client, proxy, and server for secure data transfer. ** Authentication**: Verify the identity of both the client and server before establishing a connection.Implementing a WebSocket Proxy in Python
To create a WebSocket proxy using Python, you'll need to use libraries like websocket-client (for connecting to the server) and autobahn (for creating and managing WebSockets). Here's a basic outline of how you can structure your code:
import asyncio
from autobahn.asyncio.websocket import WebSocketClientProtocol
class WebSocketProxy:
def init(self, ws_url):
self.ws_client = WebSocketClientProtocol()
self/ws_client.connect(ws_url)
async def handle_message(self, message):
Process incoming messages from the client
if message.type == 'message':
await self.send_to_server(message.data)
elif message.type == 'ping':
await self.send_pings()
async def send_to_server(self, data):
Send processed message to the original server
await self.ws_client.send(data)
async def send_pings(self):
Send pings to the client to keep the connection alive
await self.ws_client.ping()
def start_proxy(self):
asyncio.get_event_loop().run_until_complete(asyncio.gather(
self.handle_messages(),
self.start_listening()
))
async def handle_messages(self):
while True:
message = await self.ws_client.recv()
await self.handle_message(message)
async def start_listening(self):
while True:
connection = await self.ws_client.accept()
print(f"Client connected: {connection}")
Process new connections (e.g., establish a new WebSocket)
In this example, the WebSocketProxy class creates a client-side WebSocket connection to the original server. It then processes incoming messages from clients and forwards them to the original server using the send_to_server method.
To start the proxy, you'd call the start_proxy method:
proxy = WebSocketProxy('ws://original-server.com/ws')
proxy.start_proxy()
This basic implementation should give you a solid foundation for building your own WebSocket proxy in Python. You can enhance it with features like load balancing, connection pooling, and authentication to make your proxy more robust.
I hope this helps!
Python websockets HTTP2
I see you're looking for some information on Python's WebSocket implementation and how it relates to HTTP/2! Let me break it down for you.
Firstly, let's talk about WebSockets. In traditional client-server architectures, clients typically establish a connection with the server using TCP/IP, and then send requests over that connection as needed (e.g., GET, POST, PUT, DELETE). The client remains connected to the server until the connection is terminated or times out.
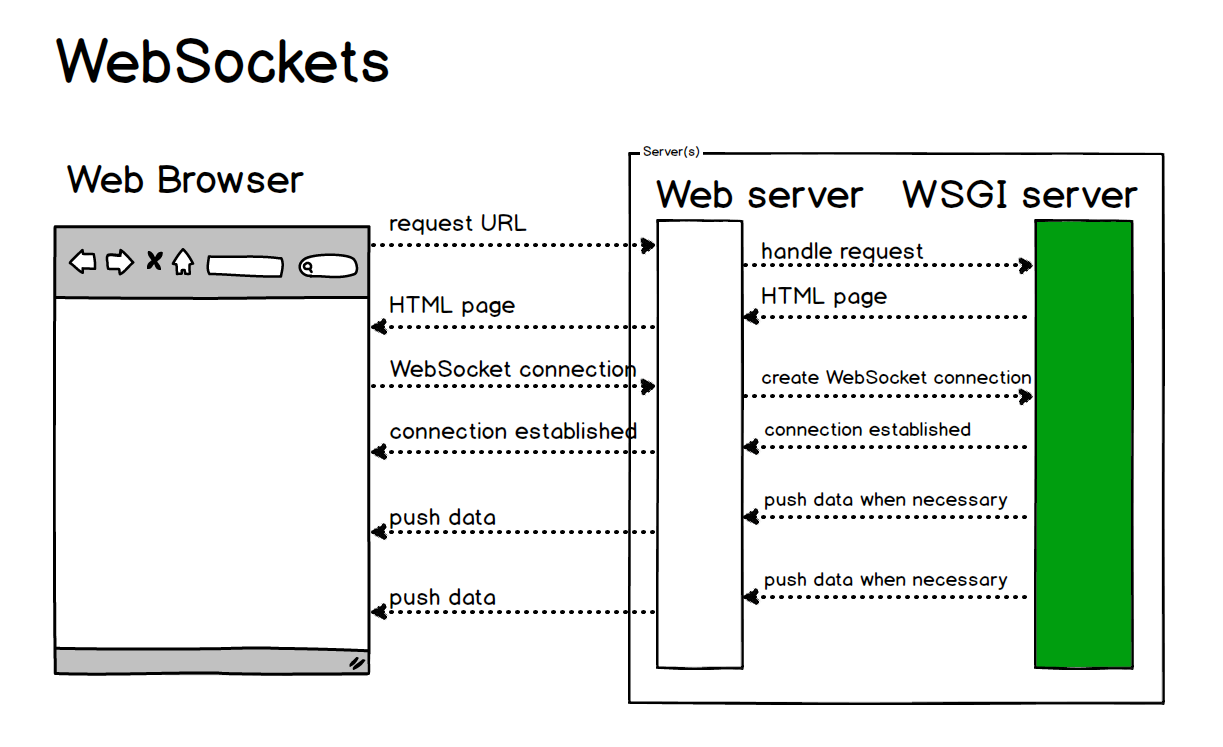
WebSockets are a different story altogether! They enable bi-directional communication between a web browser and a server. This means that, just like a chat application, both parties can send messages to each other at any time, without having to initiate a new request. WebSockets achieve this by establishing a persistent connection ( WebSocket ) over the TCP/IP protocol.
Now, when it comes to Python's WebSocket implementation, there are several options available!
PyWebSocket: A simple, easy-to-use library that provides WebSocket functionality for your Python applications. It allows you to create WebSocket connections and handle message sending and receiving. Autobahn: Another popular choice! Autobahn is a high-performance WebSocket framework that supports multiple protocol versions (RFC 6455) and offers features like multi-client support, JSON-RPC, and more!Now, regarding HTTP/2 (Hypertext Transfer Protocol version 2)! This new iteration of the widely adopted HTTP standard introduces several key improvements:
Multiplexing: In HTTP/1.1, each request-response pair has its own TCP connection. With HTTP/2, multiple requests can be multiplexed over a single TCP connection! This leads to more efficient use of network resources and improved overall performance. Binary frames: Unlike traditional text-based messages in HTTP/1.1, HTTP/2 introduces binary framing. This allows for flexible payload sizes, making it easier for devices with limited computing power (like IoT devices) to send data.Python has excellent support for both WebSockets and HTTP/2 through the following libraries:
httpx: A Python library that provides a high-level interface for working with HTTP clients. It supports HTTP/2 natively. Websockets (not to be confused with PyWebSocket): A Python package developed by Google, providing WebSocket functionality in Python!Here's a simple example of how you could use WebSockets and HTTP/2 together:
import asyncio
from httpx import AsyncClient
async def send_message(websocket):
while True:
Send message to the client (e.g., your chat application)
await websocket.send("Hello, world!")
async def receive_message(websocket):
while True:
Receive messages from the client
received = await websocket.recv()
print(f"Received: {received}")
Create an HTTP/2 WebSocket client
client = AsyncClient('ws://example.com/ws', verify=False)
Establish a connection to the WebSocket server
websocket = await client.connect()
Start sending and receiving messages concurrently
asyncio.gather(send_message(websocket), receive_message(websocket))
Please note that this example is highly simplified for illustration purposes, and actual implementations would likely involve more error handling, data serialization, and security measures.

